
Background:
This design is based on Kawasaki Rose:
Unit Origami: Multidimensional Transformations by Tomoko Fuse.
ISBN: 0-87040-852-6

I’ve been making this type of Rose for years, mostly in idle time at work. Over the years, or just by modifying the design with each new one.. The current design differs only a bit from the original, added Sepal and Cane, but the method to making them is much easier than the Kawasaki Rose. In fact, just setting up this tutorial I for whatever reason tried another way and it seems easier. Because the main steps are fold, unfold, see crease, you can do them in any order you like with practice.
Materials:
Acetate or any paper that creases well. It can be called Vellum at craft stores. I hit up Omer Deserre and normally pick up 30-40 sheets at a time. They are normally 90 cents per sheet. Opaque paper Vellum also works, but the more you use acetate the harder it is to fold regular cellulose paper.
Tools:
Sharp Edge, scissors or craft knife. Something flat and dull if you don't want to crease edges with your finger.
The more of them you're making in a sitting you'll want something other than a fingernail to crease edges especially because the acetate is hard.
It isn't as rough as paper so you won't ruin your nail.
Part 2.. Sepal. Part 3.. Cane. Part 4.. Assembly.
For practice you may want to cut your first sheet of whatever paper in half so you can practice on a smaller model, or use writing paper to practice.
Preparation:

If you’re using a full sheet to start with, I recommend 1 sheet to make a large square which will leave over a piece you can use for a stem. If you want all three parts you should use more paper and make 5 of them. Small ones from half a sheet of paper are a good size for decorations. Made from a full sheet of paper, the Rose with Sepal/Hip and Cane are almost life size.
5 A4 Legal sheets would make 5 large squares for each flower, then 1 sheet for stems (fold it vertically accordion style and then cut out 5 strips for stems). Nearly every single Rose I’ve made has a unique stem because it is so easy to go nuts with a new method to twist and flare out the top none is any better than another. And then with 2 more sheets fold over in half twice to make 4 equal small rectangles and cut them out. Fold over at 45 degree angle again to get 4 small squares. As you’ll have 8 small squares you might not want to waste the long part on the last 2 small squares. This you could cut into 2 or 3 long strips for longer stems but the thinner they are the weaker they are. All the scraps can be saved for label material.
From the last batch I made 1 was stolen. I thought about it for a while, because making a new Rose is no effort, you can insert a tiny strip of paper into the stem which can have a note, or the name of the recipient. She thought it was neat.
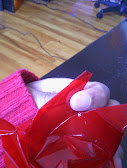
Sepal, Hip:
aka Stem Holder because technically the combination of Stem and holder would resemble the Sepal/Calyx/Hip and Cane on a real Rose.
This part is the last thing I've added to the model based on Kawasaki Rose. I added it because the tabbed ends of the petals folded under the Rose can leave an opening. With a wide variety of ways to fold those petals and tab them into each other so that the open with stay tightly set, it was getting annoying to have the pop open anyway, or not have a big enough opening for the Stem, Cane.
The objective was to get the opening large enough to permit a thick Cane that would stay put. So not just that the Stem would be rigid enough to hold like a real Rose, but that the end of the Stem held tightly in place by the Rose would not jiggle or move, thus emulating the support function of the calyx in a true flower.
Adding the Sepal meant that the opening at the bottom of the Rose could be larger and it would take up a bit more space inside the bottom of the Rose.
These steps might be difficult to follow because you can do whatever you want with this part of the model in order to make it work. With practice you'll see that the accordion folds can be modified as can the size of the petals.
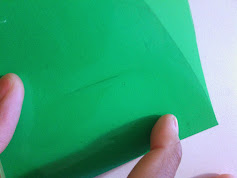
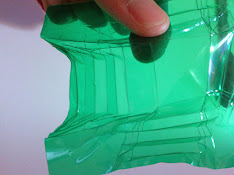
1. Taking of the smaller cut-outs from a new piece of paper pinch/crease a small square out of the middle as shown. If they aren't square yet fold a corner over 45 degrees, but try not to crease the fold to mark your square. Cut off the excess.
As with the rose, you could do this by creasing the whole way along but if you can manage to crease only the part you need there will be fewer unnecessary creases.
Starting with a square fold a side up about 1-2/5ths from the other side and pinch the middle about the width of your thumb. If you're confident you can do the same thing 3 more times for the other corners of the small square you're making go ahead. Otherwise you can unfold the paper and fold one corner up to the crease you just made. Don't crease the entire fold, just pinch the edges to mark the next fold you need to make for the small centre square.
I'd recommend marking the edges of the square by folding the corners up at least he first few you make because you can use those marks in the following steps.


2. Fold the square at 45 degrees again but don't crease the whole fold.. just pinch a tiny part of the fold on either side of the small centre square so you can more easily fold the corner up to one of the marks you made in the previous step.
Because you have two of them use the one from the opposite corner to make a wider Sepal. If they are thinner you have more room for the accordion folds in a following step.
Try not to crease the outer fold that meets the mark you made by folding the corner. The crease you are looking for is the one of the right. When unfolded you get a V. You'll see that one side is a valley fold and the other is a mountain fold when your paper is unfolded and flat with the small centre square as valley folds. Make both of these folds for the V valley folds as well. Crease the both since the paper was folder over on one side.


*annoyed that my paper somehow cracked on one corner. As that corner is visible on the final rose I could have just cut that corner a bit smaller or rounded it off. Also you'll notice that creasing the V folds sometimes goes into the small centre square. As this part of the sepal is inside the Rose when assembled.. it can be overlooked.
3. The following step is optional. It takes a bit more paper from the accordion folds which can make the last step more difficult.
What I'm doing is folding a mountain-like fingernail width lip for the V folds. Because the accordion fold can require folding the paper over into the V area, which should be avoided, the lip will provide a small buffer space. Although I still do it, when producing several roses at a time, it is hard to take the care of not folding the paper in the V area.


4. To start your accordion or fan fold you can do it in one step, folding one corner of the small centre square over and back up at the centre of the square, or from the edge of one side 4 or 5 times until you get to the middle. I start at the middle because working from the middle out will yield more uniform folds.
Try to only crease the sections between the Vs so that the Vs don't get too badly folded.


5. Once you have accordion folds up the middle sections between the Vs you can try the next optional step.
The accordion fold area is a "crumple zone". It will be easier to crumple if you make extra mountain folds from the top corners of the Vs to the mountain folds of each accordion fold. This can be tedious and difficult to do perfectly.

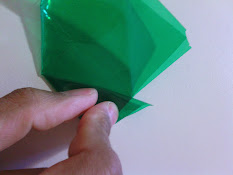
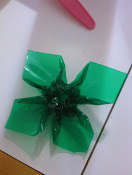
6. The last step needs two hands so I could take a picture of it. Also it involves crushing the accordion folds up to the middle of the square which can be used to vent the frustration of the previous tedium of the accordion folds and finishing them.
A tip is pinching each corner of the V folds to the middle of the small centre square and then folding it back flat so that the small centre square sits like a hat over the crumbled areas. the tighter and neater the better.

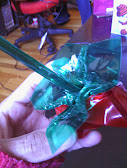
Cane:
1. Grab a sliver of paper and book fold it in half over its length. As mentioned in preparation fold an A4 into 4 horizontal long pieces or 5 vertical short ones.
I tried 2 long ones. I'm not convinced they are strong enough but the longer stems are appealing.
Fold off a portion of the top at 45 degrees. This will be the Head of the stem which will be crammed into the Sepal holder.
Again like the Sepal there's some freedom in how you twist off the head so that you can have a wide flat top roughly the size of the opening in the inverted 'Hip' of the Rose.
I've found opening the 45 degree fold and folding it back on itself works well.
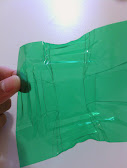
You can either roll the stem and twist it as hard as you can (when using acetate) or fold it 2-3 millimetres over and over.
I've found that folding it over from on side a couple times, and creasing hard, then from the other side and creasing had works on both paper and acetate. Once it unfolds (from flat) it tends to have a triangular or square tube. To avoid an open square you can use scissors or something hard to pinch the tube into a small 2-3 millimetre tube which you can then easily twist which will keep its shape.


Assembly:
*cram it all together*
With force.
1. Open the Hip wide enough to cram the head of your Cane into it and then cram it closed.
Normally this doesn't need any extra tools.


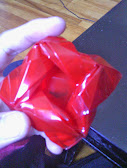
2. In order to close the base of your Rose, try different methods to taper the ends and tab them into the next one over.
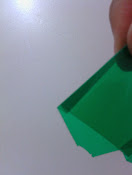
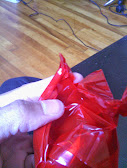
An example is pulling the outer petal fold up almost to the edge, creasing it so it will stay then folding the back part down about half a finger nail along the crease you just made. Fold this excess part back over again and crease it. Because the paper is thick this might be difficult. You could use the plastic loops of a good pair of scissors. Do this for all four petals to create pockets for the tabs you'll make on the ends of each corner.
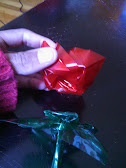
After folding the back part in again you'll have the bit of the corner folded down. This you can fold back up to make it neat. The important thing is forming the tab you'll need for the next step. Fold the corner (part on the left of my thumb in the second picture) back over towards you.
When you folding the whole end of the petal down into the bottom of the rose you'll notice it touches the inside of the next petal. Then tuck them all in. The last one can be tough You can use the tip of scissors to push the tab into the pocket of the next petal.


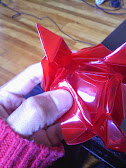


3. Cram the joined Hip and Cane into the opening of the bottom of the rose. Because both are roughly square, you can fold down the tips of the corners of the 'hat' of the Sepal holder to match the curled in lip on the petals inside the bottom of the Rose. If the tab in pocket grip is strong the petals shouldn't pop open even if you cram your Sepal and Cane in. Ultimately once fully assembled it should all be pretty solid enough to whip around in the air holding it by the Cane.. or like the next one I made, it got sat on and dropped on the floor twice within 3 minutes of final assembly and was fine.


Note:
If you wanna get even fancier you could monogram the rose by inserting a slip of paper into a petal before closing the tabs at the bottom or as mentioned into the stem as a Fingernail by finger length slip of paper.
I've so far only done the second method because the rose of one of my recipients went missing so I slipped "Property of 'Recipient's Name'" into the top of the stem before creasing it. Come to think of it.. my craft stuff tends to get stolen even though I handed out a couple dozen of them.. *shrugs*